Servicing A French Lever Escapement Carriage Clock

For those curious about what takes place during a mechanical overhaul at our workshop in Weyhill, Hampshire, here is another servicing diary entry. This time it’s the turn of an antique timepiece Carriage Clock (timepiece means that the clock has only one train of wheels and therefore does not strike or chime).

This is a small brass cased French carriage clock from around 1890-1900 and has an eight day duration. The dial is 4’ and there is some damage to the enamel surface in the upper right-hand corner. There are bevelled glass panels on all four sides and one oval shaped one on the top of the case, two of which have some slight damage along the edges. The case has previously been lacquered which now shows some signs of wear and removal over several years, possibly due to polishing. The maker and provenance are not known as the movement and the case are unsigned.

The first thing that becomes obvious upon inspecting the mechanism is that the platform is not the original one that would have been made for this clock. The existing platform has been poorly modified in order to make it fit this movement by cutting away some of the bottom plate. It is worth bearing in mind that a repair such as this with a component that is clearly not original is likely to decrease the value of the clock.
The customer has been given the option to have the platform replaced with a more suitably-sized version at an additional cost, but has declined as the current one appears to function well.

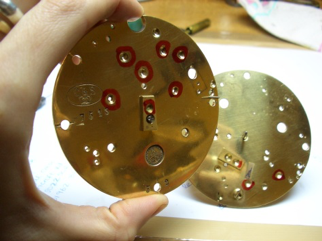
I can see that there is some evidence of holes having been bushed by someone in the past. Generally these have been carried out well with no damage to the surrounding area of the plate, although I notice one with a slightly untidy oil sink which I can quickly correct once it is apart.
The pivots seem to be in good overall condition with no re-pivoting required – a small amount of burnishing should get rid of the minor grooves in some places.
When the mainspring is removed from the barrel it is evident that it has a conical shape to it which is likely to be the result of it having been removed and replaced by hand. The fact that it is also slightly set – the inner coils are failing to return to their unwound position – means that I will replace this spring.

In order to replace the mainspring I have to measure the barrel width, depth and the thickness of the current mainspring. I am aware that a common issue nowadays is that mainsprings are more powerful than before – this is due to a new rustless steel alloy which is being used in their production. With this is mind I have made it a habit to downsize the thickness by 0.5mm when ordering new springs to try and avoid this issue. If the mainspring is too powerful for the clock it may prove difficult to wind and, in extreme cases, could cause some damage to the clock.
The new mainspring was bought from HS Walsh to the exact size needed, therefore there was no need to adjust the length in any way. It is important that a mainspring is thoroughly cleaned before fitting as they are often coated in a compound designed to keep away the rust which needs to be removed. I do this by first cleaning the spring with soapy water and then placing it in the horolene for several minutes.

To service the main part of the mechanism (everything but the platform), components are placed in the clock cleaning fluid in the ultrasonic tank for 5 minutes before going into the rinse and finally being dried off using a hairdryer.
Once the components have been cleaned and dried I start with the basic servicing routine of burnishing the pivots. After any wear has been removed and the pivots are burnished to ensure a hardened surface and the train is replaced between the plates to check for any holes which may need bushing. It is important to carry out this check after burnishing as the process will remove some of the material from the pivots, decreasing their diameter and therefore possibly resulting in a pivot which is too small for the original hole.
I identify two holes which require attention – the pivot holes of the contrate wheel both back and front plate. The particular pivot hole in the back place has a recess surrounding it to allow a screw to act on the end of the pivot thus controlling the end shake of this arbor. This is a vital part of the escapement as it will determine how the escape wheel pinion leaves and contrate wheel teeth interact and can have a significant effect on the amplitude of the escape wheel. It is therefore important to ensure that the bushed hole is flush with the recess. I decide to use a French bush to achieve this as it can be hammered in to place and then a small brass pip is snapped off. The front pivot hole is bushed as normal with an oil sink cut to the size of the original.
The oil sinks which I had previously identified as having been left rather untidy are corrected using rose cutters to bring them back to the original diameter. It is important the oil sinks are neat and any bushing is left flush – this ensures that the oil will remain in the place where it is needed without leaking onto the clock plate.

The platform escapement is cleaned in the watch cleaner, ensuring any small components are secured in a small basket before starting. Once clean and dried, the escapement is worked on in the watch lab to minimise the potential for dust etc. entering the cleaned components.
I start by checking all the vital components under the microscope to ensure there is nothing which might need replacing. The jewelled holes, pallet stones, escape wheel teeth, escape wheel pinions, all pivots and the hairspring are checked and all are in good condition.
Once all the components have been checked the holes are pegged out using cocktail sticks dipped in methylated spirits. This ensures that any small particles which may have gathered during my inspections of the components are removed as they can have a significant effect on the amplitude of the escape wheel in such a small assembly.

Once both the movement and the escapement are back together, the platform is replaced on top of the movement and the entire assembly is placed on a timing machine. After some small adjustments to the beat and the rate it is clear that the clock is running very well – the escape wheel has an amplitude of 277 degrees and there are minimal fluctuations to the rate in several positions.

Servicing a Painted Dial Eight Day Longcase

Another tale from the bench of my apprentice days, overhauling a lovely Longcase clock that required replacement seconds and calendar hands. Longcase clocks are my favourite to work on here in our clock workshop in Hampshire.

The movement has already been fully dismantled by my colleague so I inspect the wheels and other parts for any obvious damage. All the pinion leaves and teeth seem to be in good condition with no significant wear.
All pivots are burnished on the lathe and finished by hand using polishing papers.
The brass plates are cleaned briefly in the ultrasonic tank, rinsed and dried using a hairdryer. This is done to get rid of the old oil which will enable me to identify any pivot holes that may need attention.
Both the going and strike trains are replaced in turn to check the newly burnished pivots in each of the pivot holes.
I identify two pivot holes that are in need of bushing due to wear and mark the plates with a drywipe pen so that I can easily identify them.
Cutting broaches are used to widen the hole for a suitable brass bush. The bush is then hammered in so that it is flush with the inside of the plate and the other side is filed down and excess material is removed to create the oil sink using a manual drill and an oil sink cutter to the depth of the existing ones on the plate.

The brass plates are badly corroded from fingerprints and oil so I decide to clean the movement in a Horolene solution which I have found is better for removing tarnishing.
The parts are removed from the Horolene after 15 minutes and a fine wire wool is used to polish up all surfaces before being rinsed
Next a chalk brush is used on the plates to produce a clean shiny finish that the customer will appreciate.
The pivot holes are pegged out to remove any remaining cleaning solution that may cause corrosion if left.

The rack spring has broken at some point and has been soldered rather badly by someone who has worked on the clock previously. I have therefore decided to replace it.
Measurements are taken from the original spring and the teardrop shape is marked out on a piece of brass. A piercing saw is then used to cut out the shape and it is finished off with a file and some fine grade emery paper. A hole is drilled through the centre to match the width of the screw.
Next, some brass wire is shaped and manually hardened by being lightly hammered on a steel block. When the wire is springy and retains its shape a hole is drilled into the bottom of the teardrop and the wire is soft-soldered in place.

I have decided to blue the hands as they have previously been painted black which has chipped over the years and doesn't look very attractive. The black paint has to be removed first which is done by scraping it away with a scalpel blade. The surface of the steel hands is then polished up using some emery paper and a nail buff.
For blueing hands a steel tray filled with brass filings is secured in the vice. This is used in order to carry the heat evenly across the hand and ensure the same colour is achieved along the whole length.

A larger blowtorch is used and a pair of tweezers so that I can lift one end of the hand from the surface if it is changing colour too fast. This often happens on the end with the collet as it is closer to the flame underneath and therefore more exposed to the heat.

The movement is re-assembled, ensuring the strike train is correctly lined up, and oiled with a natural heavy oil for larger movements such as longcase clocks.
The pendulum and weights are replaced on new weight lines and the movement is left to run on a test stand to ensure that it is striking correctly and the time keeping is accurate.

The customer has asked us to replace the subsidiary hands as the two existing are not the originals and do not fit in with the design of the main clock hands.
Based on the design of the minute and hour hands I use a copy of Painted Dial Clocks from 1770-1870 by Brian Loomes to get an idea of what the original subsidiary hands would have looked like.
I settle on a design that matches a longcase clock we have in the shop which has hands of a similar design.
Each hand is drawn out to scale to obtain the correct measurements. This is then marked out onto the steel by scoring the surface so I can see where to cut.
A piercing saw is used to cut as close to the lines as possible in order to minimise the amount of filing to be done. The piercing saw is kept in an upright position to ensure the edges are completely straight.
Once the hand has been cut from the sheet of steel the edges are filed to give a perfect circle and straight edges along the length of the hand. It is finished with some fine grain emery paper.
For the second hand, a brass rod is hollowed in order to create a tube which will fit over the escape wheel arbour. A hole is then drilled into the second hand and is riveted to the brass rod.
The second hand is then cleaned and polished and blued using the steel tray and brass filings.
For the calendar hand a hole is drilled in order for it to be screwed to the calendar wheel. It is then cleaned, polished and blued in the same way.

Servicing a Gilt French Mantel Clock

I recently came across some servicing diaries from my early days as an apprentice which I thought I would share on here as they give a good overall picture of the process involved in a mechanical overhaul, the service we offer from our antique clock repair workshop in Andover, Hampshire. When your antique clock leaves our workshop following an overhaul, it will have a 2-year mechanical guarantee.

Once the movement has been removed from the case it is fully dismantled and notes are made of any repairs considered necessary that are noticed during this process.
The larger pivots are burnished on the lathe and any smaller more delicate pivots are done by hand using an extended-handle pin chuck. These pivots have suffered significant corrosion on the acting surfaces and small pits are visible to the naked eye.

The movement has an initial clean in the ultrasonic tank in order to remove any old oil and dirt. This also enables me to see which pivot holes need bushing. After 5 minutes the movement is removed, rinsed and dried using a hair-dryer.
Sadly this clock is in very poor condition and a lot of the pivot holes have worn into an oval shape. I mark 11 holes on the plates that I think need bushing and, as it is quite an excessive amount, check with my colleagues to ensure they are all necessary. Both agree that, given the surprisingly bad condition of the clock, the repair work needs to be carried out to avoid further wear.

The holes are widened using a cutting broach, turning the plates 90 degrees regularly to ensure the broach is cutting in a straight line. A tool is used to remove the burr from the edge of the freshly-cut hole before the bust is inserted.
The bush is driven in from the inside and the slightly proud edge is removed using a fine grade file and sellotape to protect the rest of the plate. The other side of the bush is filed down and an oil sink cutter that matches the existing depth is used to create the sink and make the repair flush and tidy.
The bush is cut using broaches to the correct size. All the pivot holes are then tested by replacing two adjacent wheels at a time and running them alongside each other. When all the pivot holes have been tested and are working correctly the whole train is replaced between the plates to ensure all the wheels are running with the correct depthing.

Now that all the repair work has been carried out I have decided to re-blue the screws as the surface has been slightly worn. I start by using some fine-grade emery paper to remove the oxidised layer and a buff to shine the surface. The slots are also tidied using a piercing saw.
A small blow-torch is needed for this process and some well-worn tweezers are used to hold the screws in front of the flame. When each screw reaches the desired colour it is placed quickly on a steel block to allow it to cool down.

Once all the screws have been blued the entire movement is placed in the ultrasonic tank once again for a full clean.
The plates, barrels and wheels are polished by hand with a soft chalk brush and gloves are worn to ensure no fingerprints are left on the clean movement which could cause corrosion.
All the pivot holes are pegged out to remove any cleaning products or dirt that may have accumulated. This is done using toothpicks which are turned in each hole until there is no residue on the wood.
Next the movement is fully assembled, taking care to ensure that the strike train is properly lined-up so that the warning pin can run without the hammer being lifted until the strike commences and the clock will strike when the minute hand is exactly at the 12 position.

All pivot holes are oiled using a light oil for french movements. The escapement pallets are also oiled to minimise wear until the next time that clock is serviced.
When the movement is back together the pendulum is replaced and it is placed on a test stand. An amplifier is used to ensure it is in beat. The minute hand is moved through a full 12 hours to check the clock is striking correctly.
Finally the clock is left in the test room for a minimum of 3 weeks to ensure it is running correctly and keeping accurate time.

A Clock Reapirer's Library

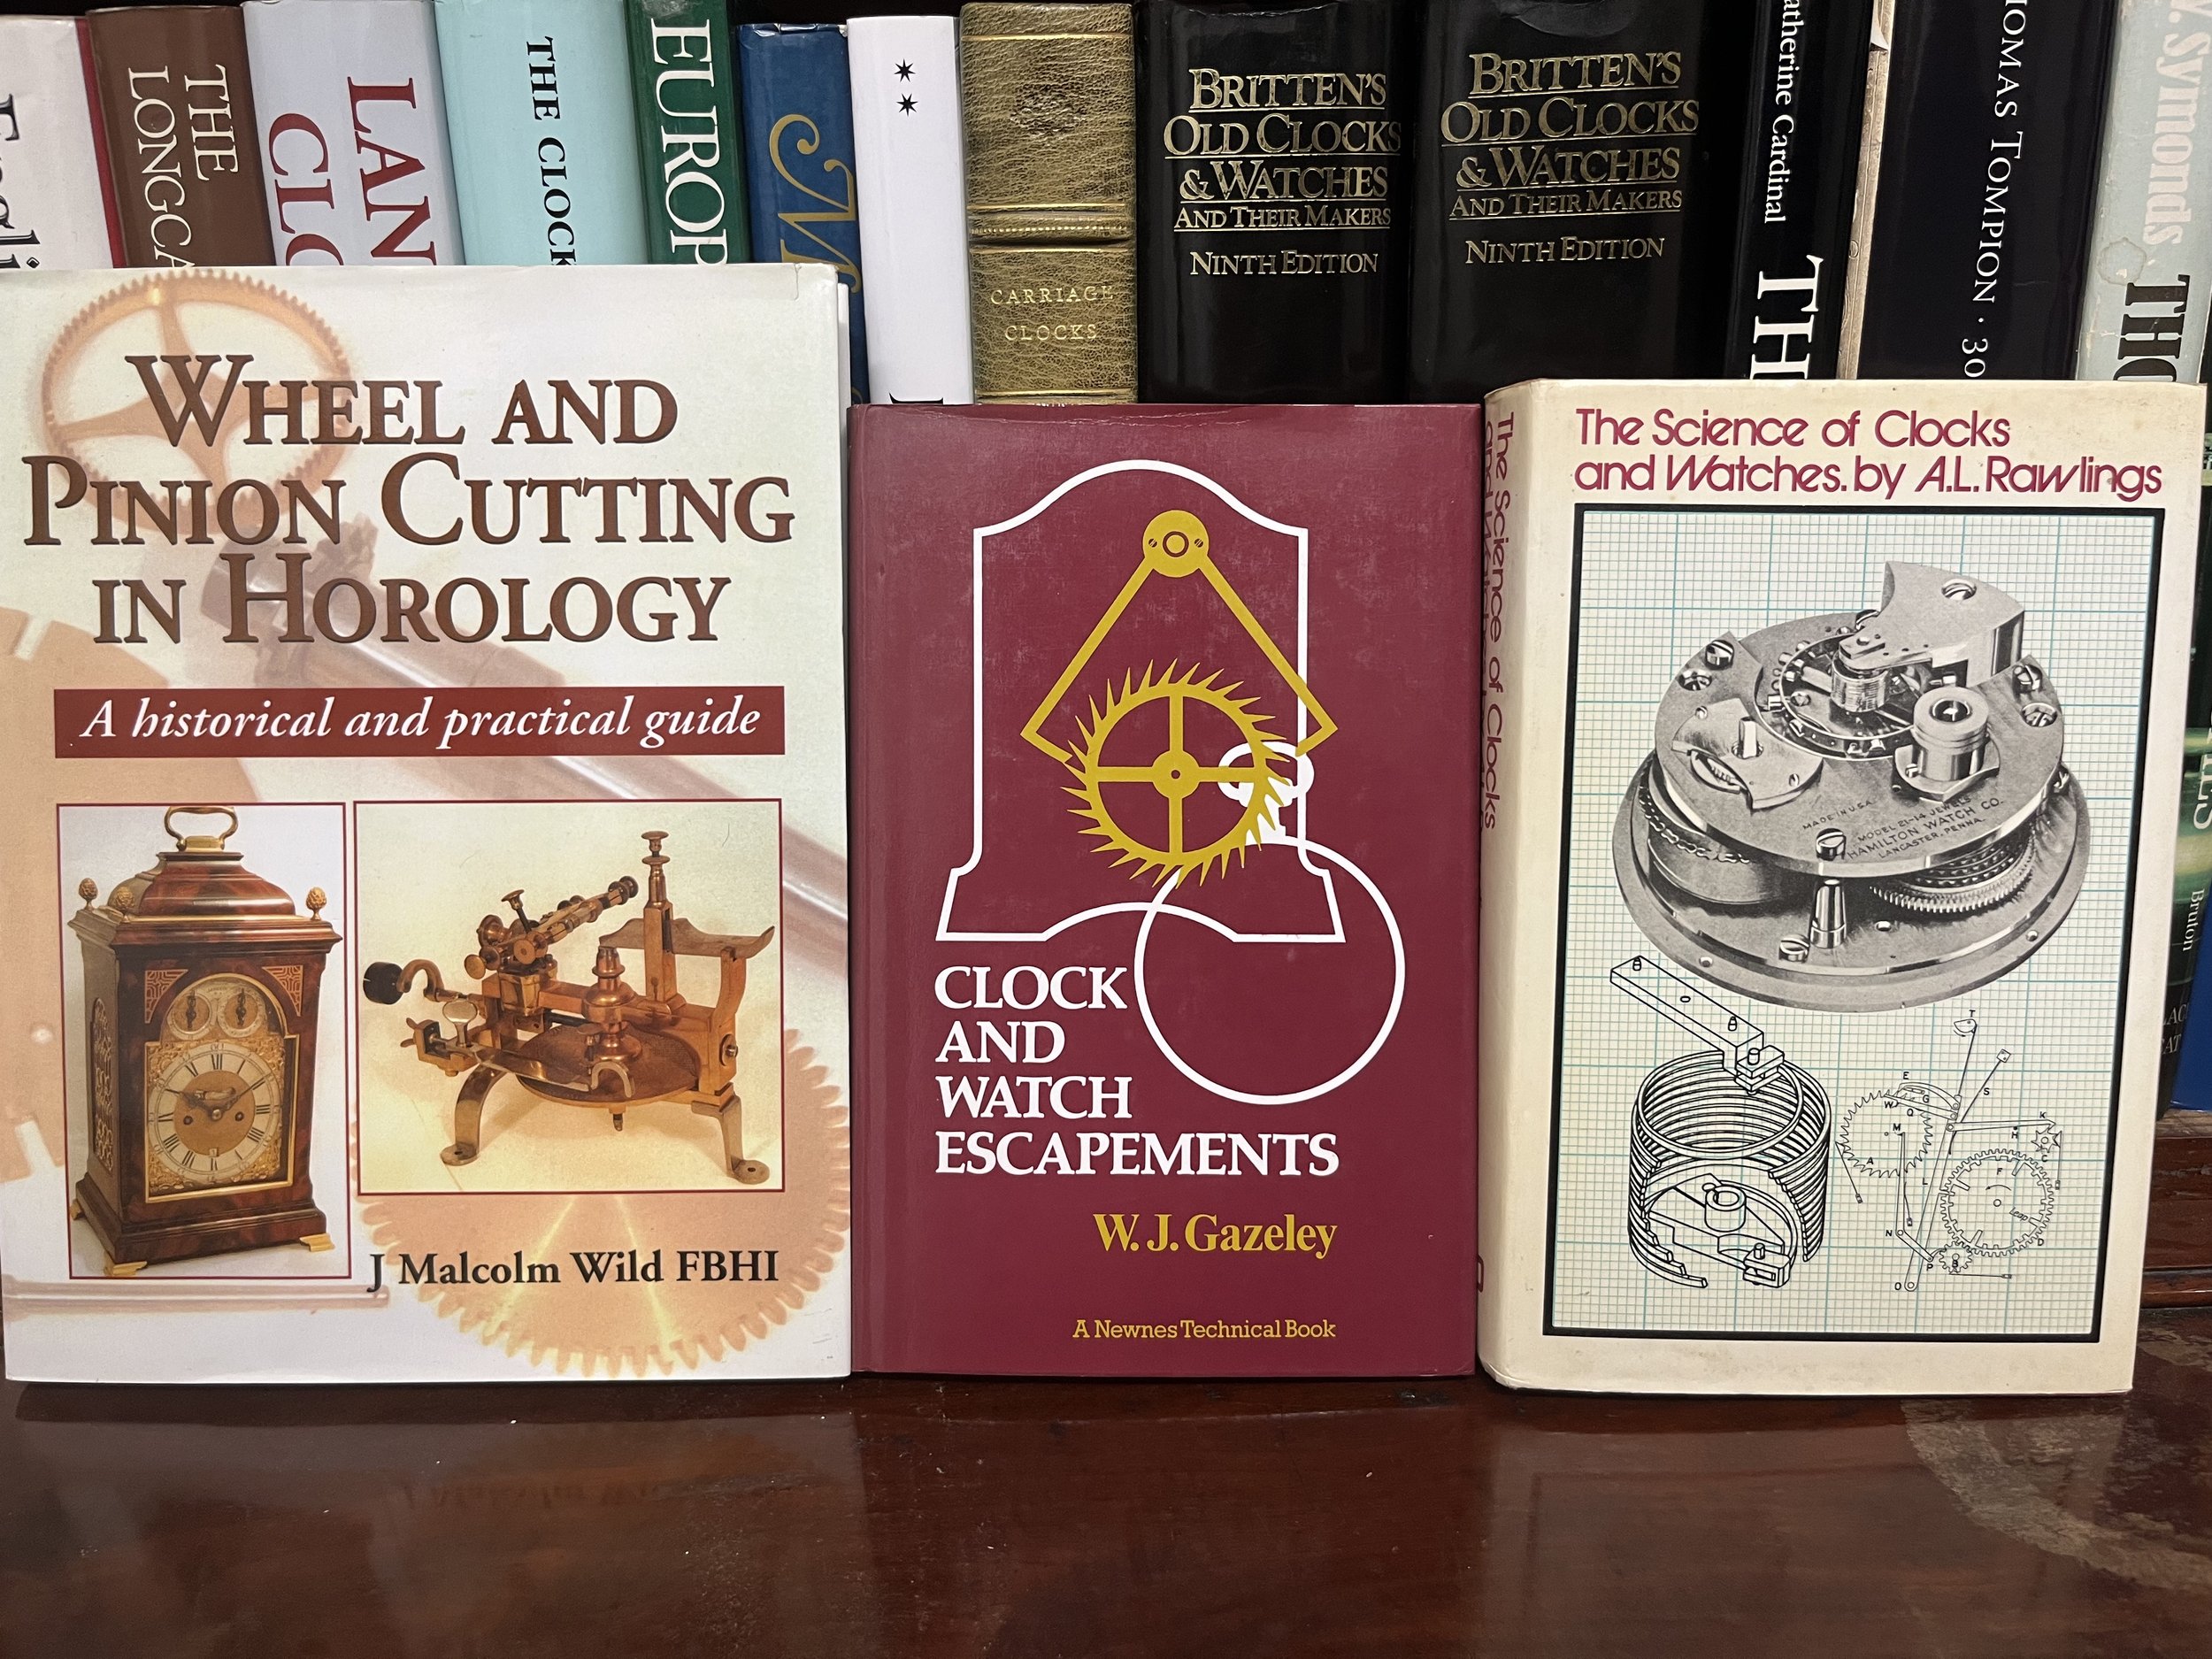
Books, books and more books! Here at our workshop in Hampshire we have quite a varied selection of horological reading material. From practical repair manuals to technical BHI course handbooks, historical records of clock makers through the ages to philosophical explorations of the nature of time itself.

There are a few that get regularly pulled from the shelves anytime a more technical solution is required.
The first, which was an essential part of my Horology Degree course when I was wheel cutting and designing the mechanism I made as my final project, is Wheel and Pinion Cutting in Horology by J Malcom Wild. The book contains a comprehensive guide to gearing in horology. It’s a fascinating aspect of clockmaking that many repairers don’t get the opportunity to delve into, but if you have a mathematical brain and enjoy the scientific equations, this is certainly worth a flip-through.
Secondly I would choose Clock and Watch Escapements by W.J.Gazeley. Anytime I repair a French Brocot Mantel clock and need to re-adjust the position of the ruby jewel pallets, this one comes off the shelf. The angles for these pallets have to be very precise and the diagrams in this book are a useful guide.
The last selection is The Science of Clocks and Watches by A.L. Rawlings. This is a type of expounded glossary with lots of helpful diagrams on a wide range of common and quirky arrangements found in clocks and watches. It’s a good reference point and simple to use.

There are lots of books available on the subject of clock repair and horology. Hopefully this post will inspire you to keep an eye out next time you’re visiting your local bookstore.